pylon vTools: Per Cominciare
Con Basler pylon vTools, puoi creare funzioni di elaborazione delle immagini ad alte prestazioni e integrare in modo flessibile tutto ciò di cui hai bisogno nella tua applicazione.
Prerequisites
In order to work with vTools, a camera must be connected and set up correctly. Alternatively, you can use the free Image Loading vTool to load image files for input in other vTools.
Tip: Some vTools are free and included in the pylon Viewer setup, others require a license.
Workbench
Apri il pylon Viewer.
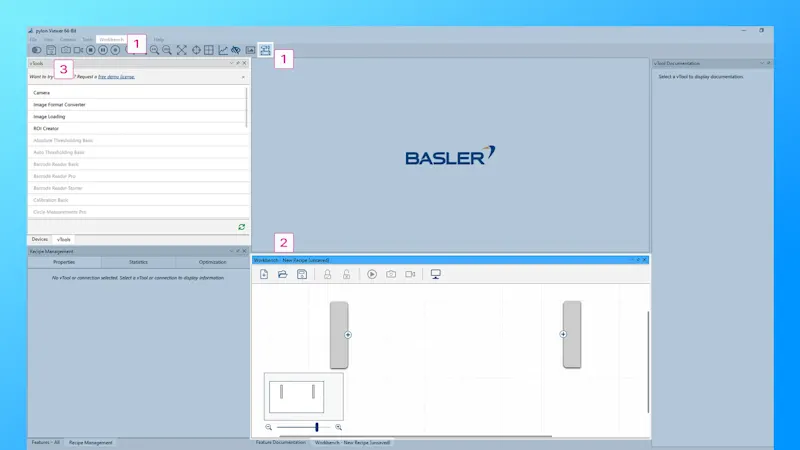
Per avviare i vTools, avvia il Workbench cliccando sul pulsante Workbench nella barra degli strumenti o sul menu Workbench nella barra del menu.
Una Recipe viene creata automaticamente.
Tutti i vTools disponibili sono visualizzati nel pannello vTools a sinistra. I vTools con licenza appaiono in nero.
Suggerimento: solo i vTools con licenza o gratuiti possono essere aggiunti a una Recipe.
Licensing
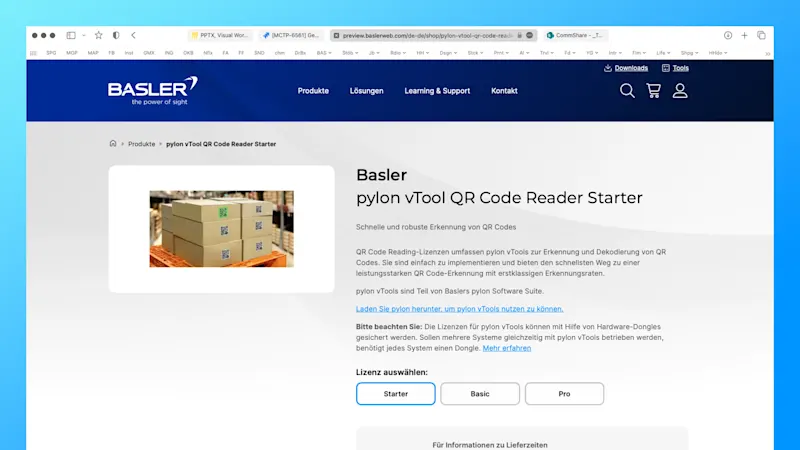
For an overview of available licenses or to request a free demo license, click Help and vTool Licensing or use the top link in the vTools pane.
Available licensing models are listed on each vTool detail page:
Tip: Each vTool offers tiered licensing models – Starter, Basic, Pro – to support different needs and budgets without compromising quality or performance.
Creazione di una Recipe
Per aggiungere un vTool alla recipe, clicca su di esso nel riquadro vTool oppure fai clic con il tasto destro nel riquadro Workbench. Per iniziare, seleziona il vTool Camera.
Fai doppio clic sul vTool Camera. Seleziona una telecamera e clicca su Assign. Una freccia verde indica che la telecamera è stata assegnata.
Per impostazione predefinita, la telecamera è configurata in modalità di scatto continuo. È possibile modificare questa modalità in scatto singolo.
Clicca sul pulsante Run per avviare la recipe.
L’area di anteprima del riquadro Recipe Management mostra immediatamente il risultato del vTool selezionato, in questo caso: l’immagine della telecamera.
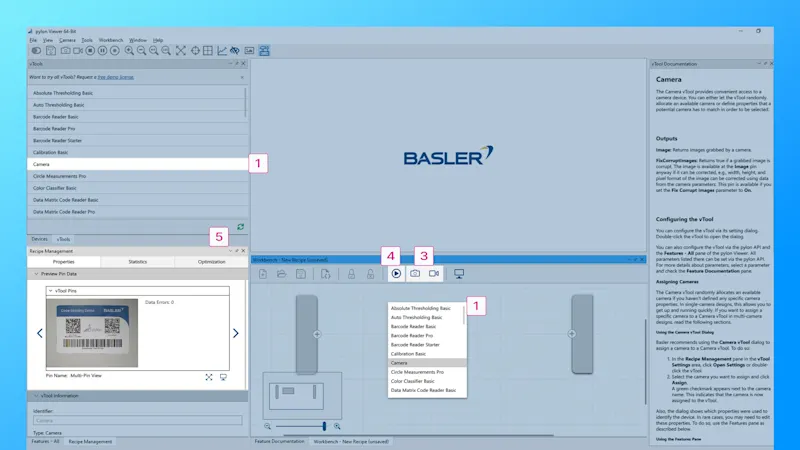
Gestione delle recipe e impostazioni dei vTool
Prima di aggiungere un altro vTool alla recipe, ricordati di fermare la recipe attualmente in esecuzione.
Ora puoi aggiungere un altro vTool – ad esempio facendo clic con il tasto destro nel riquadro Workbench – e collegare semplicemente i vTool con il mouse. Solo gli input e output dello stesso tipo possono essere collegati, ad esempio: Immagine <> Immagine.
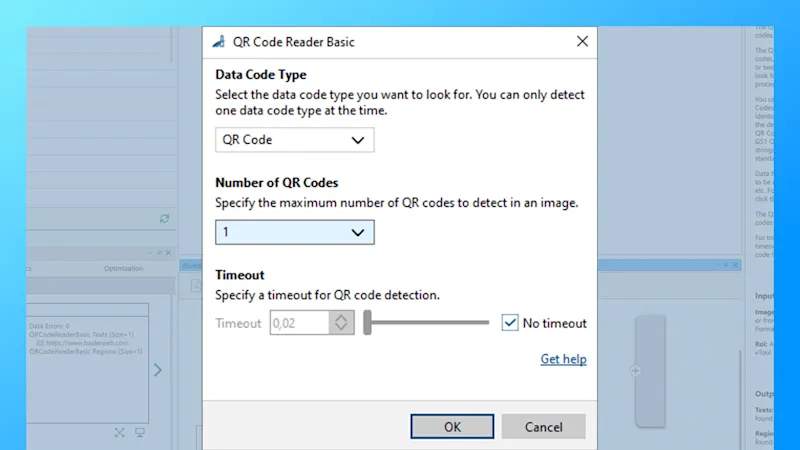
Per modificare le impostazioni di un vTool, fai doppio clic su di esso.
Adatta le impostazioni alle tue esigenze specifiche.
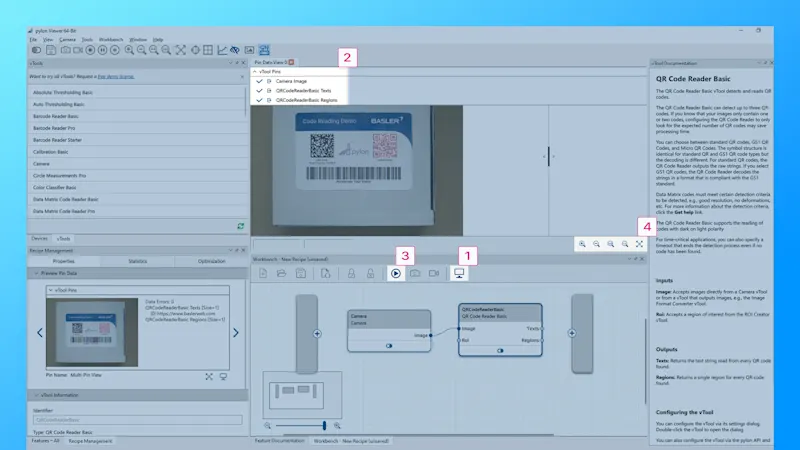
Pin Data View
To take a closer look at the vTools result in a recipe, open the Pin Data View.
Select all pins of interest.
Run the Recipe to see the results.
Adjust the Pin Data View View Settings as needed. Detailed results are displayed next to the output image.
Tip: Not all pins are selected by default.
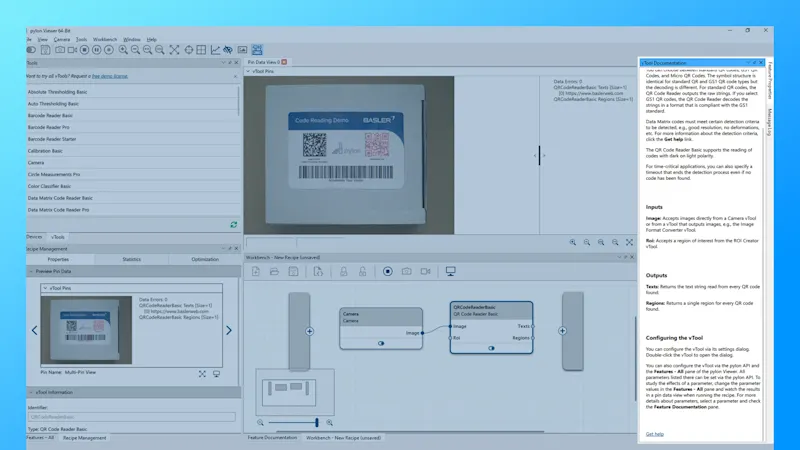
Integrated: Basler Product Documentation
We have integrated documentation into the Basler pylon Software Suite:
The vTool Documentation pane on the right side of the pylon Viewer provides a brief overview of the currently selected vTool.
For more detailed information, scroll down and click Get help. The link will take you to the Basler Product Documentation.
Tip: The Basler Product Documentation can be accessed from the pylon Viewer at any time, even if you are not connected to the Internet.
pylon vTools
Componenti aggiuntivi software flessibili per la visione industriale
Con i vTools modulari di pylon, non si acquista una libreria di visione estesa, ma solo le funzioni di elaborazione delle immagini necessarie, basate sull'intelligenza artificiale o su algoritmi classici. Selezionate la licenza appropriata (Starter, Basic e Pro) con la gamma di funzioni desiderata.
